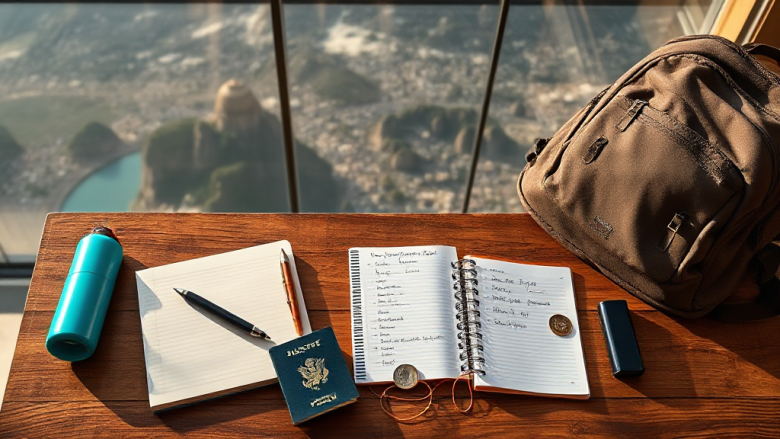
Your first budget trip is thrilling. It’s also a little terrifying, because the to-do list seems to grow every time you open your notes app. Flights, hostels, visas, money, insurance, packing, that niggling fear you’ve forgotten something important. I still remember standing in a departures hall on my first proper shoestring trip, realising I’d booked a non-refundable bus I couldn’t afford and packed four pairs of shoes I never wore. This budget travel checklist for first timers exists so you don’t repeat my mistakes. Work through it in order, and the guesswork disappears.
The trick is sequence. Most first-time travellers lose money by doing things in the wrong order: booking flights before checking visa rules, buying gear before knowing the climate, or changing cash before comparing card fees. Follow the phases below and each decision gets cheaper and calmer.
Phase 1: Before You Book Anything
This phase costs nothing and saves the most. Resist the urge to grab the first cheap flight you see.
Fix your total budget, not just your flight budget. Write down a realistic number you can spend without borrowing. Then split it roughly: 40 per cent transport, 30 per cent accommodation, 20 per cent food, 10 per cent activities and emergencies. That last slice matters more than beginners think. A blown tyre or a missed connection shouldn’t end your trip.
Check entry rules for your passport. Visa costs, e-visa fees and proof-of-onward-travel requirements can add real money. Some countries charge arrival fees that catch people out at the airport. Confirm everything on official government sources before you commit to a route.
Pick a destination that matches your budget, not your Instagram feed. A country with cheap buses, street food and dorm beds will stretch your money far further than a pricier neighbour. If you’re set on somewhere expensive, plan to travel in shoulder season and stay outside the centre.
Check the weather and local events. Accidentally arriving during a major festival can triple accommodation prices overnight. A quick calendar check avoids that entirely.
Decide your travel style honestly. Dorms, guesthouses or private rooms? Night buses or daytime trains? Knowing this before you search stops you from booking something you’ll resent paying for.
Phase 2: Booking Without Overspending
Now you can start spending, but carefully.
Book flights first, then everything else. Use flexible date searches and compare nearby airports. Tuesday and Wednesday departures are often cheaper, though it varies. Set a price alert and buy when it dips rather than waiting for a perfect fare that may never come.
Book your first two nights only. Arriving somewhere new is disorienting. Locking in your whole trip from your sofa means you can’t adapt when you discover a cheaper, lovelier town two hours down the road. Book the first stop, then decide as you go.
Look for accommodation with breakfast and a kitchen. A free breakfast and access to a stove can save a surprising amount over two weeks. Hostels aren’t just for partying; many have quiet dorms and excellent kitchens.
Book long-distance transport early where prices rise. Trains and budget airlines in some regions get more expensive closer to the date. Buses usually stay stable, so leave those flexible.
Read the cancellation terms. A slightly pricier room you can cancel is often worth more than a cheap one you can’t. Plans change, and losing a night’s fee hurts.
Phase 3: Packing Light and Packing Smart
Every kilogram you carry is a kilogram you’ll regret on a hot day. Pack for one week and do laundry; it’s cheaper than paying for hold luggage.
Start with a carry-on-sized bag. Even if you check a bag, this forces discipline. Roll your clothes, use packing cubes or simple zip bags, and leave a little empty space for anything you buy.
Bring layers, not outfits. Three tops, two bottoms, one warm layer, one waterproof shell and comfortable walking shoes will cover most trips. Blisters ruin budget holidays faster than anything.
Pack a small medical kit. Painkillers, plasters, rehydration sachets, any prescription medicine in its original packaging, and a copy of your prescription. Buying these abroad isn’t always cheap or easy.
Don’t forget the boring essentials. A universal adapter, a power bank, a reusable water bottle with a filter, a padlock for hostel lockers, and a microfiber towel that dries overnight.
Weigh your bag at home. Budget airlines charge brutal fees at the gate. A five-pound luggage scale pays for itself once.
Phase 4: Documents, Money and Insurance
This is where first-timers lose the most money through avoidable fees. Slow down here.
Check your passport’s expiry date. Many countries require six months’ validity beyond your return. Renewing late is expensive and stressful.
Photograph every document. Passport, insurance policy, bank cards, bookings. Store them in a password-protected folder in the cloud and email a copy to yourself. If your phone is stolen, you’re still covered.
Buy travel insurance. It feels like wasted money until it isn’t. A sprained ankle or a cancelled flight can cost more than your whole trip. Read what’s actually covered, especially for any activities you plan to do.
Tell your bank you’re travelling. A blocked card abroad is a nightmare. Also check foreign transaction fees and ATM charges before you go, and consider a card designed for travel if your current one is expensive.
Carry a small amount of local currency for arrival. Enough for a bus, a snack and a SIM card. Airport exchange desks usually offer poor rates, so change a little before you fly or withdraw from an ATM once you land.
Keep money in two places. Split cash and cards between your bag and your person. Never keep everything in one pocket.
Phase 5: Tech, Apps and the Final Week
The last stretch is about smoothing the journey and avoiding panic spending.
Download offline maps and translations. They work without data and save you from expensive roaming charges when you’re lost.
Sort your phone plan. Either buy a local SIM on arrival or add a travel eSIM before you leave. Check prices for both; sometimes one is far cheaper depending on your destination and trip length.
Save bookings offline. Screenshot confirmation emails and download tickets. Airport Wi-Fi isn’t guaranteed and roaming data runs out.
Set a daily spending target. Divide your remaining budget by your trip days. A simple number in your notes app keeps small purchases honest.
Check in online as early as allowed. It avoids airport queues and sometimes secures a better seat without paying extra.
Arrange your first day. Know how you’ll get from the airport to your accommodation, and have a rough plan for food and a SIM card. A calm first afternoon sets the tone for the whole trip.
Tell someone your itinerary. Share your flight details and accommodation with a friend or family member. It’s a small step that matters if anything goes wrong.
Finally, accept that you won’t get everything right. Budget travel is a skill, and every trip teaches you something the checklist can’t. You’ll overpay for one meal and find a hidden cheap gem the next day. You’ll pack something useless and forget something obvious. That’s fine. The point of this budget travel checklist for first timers isn’t perfection; it’s arriving prepared enough to relax, spend wisely and actually enjoy the adventure you’ve been saving for. Print it, tick it off, and go.